

Master mechanic/goddess of metal Mary Bielich of Derketa (day job: Honda automotive technician) has plenty to say about ripping things up on stage, on tour and under the hood. Take notes.
Are your vans treating you well — or at least as well as you’ve been treating them?!
If you are currently on the road, or if you’re preparing to embark on your magical mystery tour all the way to New York CIty – or New Hope, New Jersey – there’s simply some stuff that you’ve gotta KNOW about the faithful roadhorse that is getting you from city to city. Or, town to town. Or, borough to borough. Who am I to judge, right?
I think it’s time we had the talk. Yes, THAT talk. Ladies and gentlmen, I’d like to talk to you about… YOUR TIRES.
Ahhh… I can hear the groans resonating across the inter-webs and through my tiny, outdated speakers.
“Tires… What an elementary topic,” you say.
“Tires… Let’s discuss engine performance,” you say.
“Tires.. .I’m so above it,” you say.
“Tires… It is to laugh,” you say.
YES, TIRES, and here’s why – If just ONE of those rubber rings is seriously compromised, you aren’t going ANYWHERE without the accompaniment of a big, gnarly tow-truck, and a driver to match! Do you guys even KNOW what your van is riding on? Do you know how a compromised tire could effect your livelihood… er… your very expensive hobby?
“BAM!” – Tire
“CRAP!” – You
Here it comes, that funny feeling again — that feeling of dread that accompanies the realization that your immediate future has now been cursed with lost time, potentially lost dinero and with passers-by who will DEFINITELY point directly at you while open-mouth laughing because you are now going to have to change a tire while donning your studs, spikes, possibly pleather, and you are going to look like a knob.
YES, YOU ARE GOING TO LOOK LIKE A KNOB.
See? I got you at “looking like a knob”.
SO… let’s talk Tofurky. Let’s discuss being preemptive in regards to these types of nightmare/daymare situations, hmmmmm?
(Blogger’s definition — “DAYMARE”: (Noun) – Similar to a nightmare, but occurs mid-day in tour van while sitting straight up with greasy, sweaty head tipped backwards and grungy, boozy mouth hanging wide open, while sleeping off the night/morning’s hangover, much to the chagrin of bandmates/vanmates.)
Okay – BACK TO THE TIRES.
To properly perform the duties of a one man/woman pit crew without having to call for help along the way – To get RIGHT back on the road and resume at full speed ahead – I recommend that you don’t leave home without the following things:
1. Your valid AAA membership! (NOT AA – You can reserve that membership for when you are older and retired from road life.)
Why: I am already contradicting myself — I JUST promised you that the list I am about to provide will render you a “one-man/woman tire-schleppin’ pit crew.” However, even top techs on the road need help from time to time. I cannot stress this enough: If you hit a snag, run into the worst weather in the world, or if you don’t fancy changing a tire while dangling off the edge of a cliff, put in the call! Safety FIRST, be that “metal” or not!
2. A full-sized spare
Why: A full-sized spare is THE best to bring along because it is an exact replica of what is already on your van, so when it has been installed in place of the compromised tire and rim, you are road ready! “Donuts” (Mmmmm….Doughnuts…) are the NEXT-best-thing to a full-sized spare, as they will get you as far as the nearest tire station, but are NOT meant for highway-speed travel and shouldn’t been driven on for long stretches of road. A full-sized spare that has been properly installed is THE best option because no additional stopping or help is needed – Just change and GO! Installing a “donut” requires the same amount of time and effort, plus you must then find the closest tire station/garage that may or may not have a replacement for you and may or may not be OPEN at the time. (Note: Tires favor giving out in the middle of the night and in the middle or BFE. Love them, and they shall love you back. Neglect them, and they shall rebel like a suburban teenager.)
3. A jack
Why: Okay… If you don’t know why you need a jack, then you ALSO need to bring along someone who DOES, or you need to bone-up on your basic-basic-BASICS. Make sure that your jack is present, operational and intact before you leave!
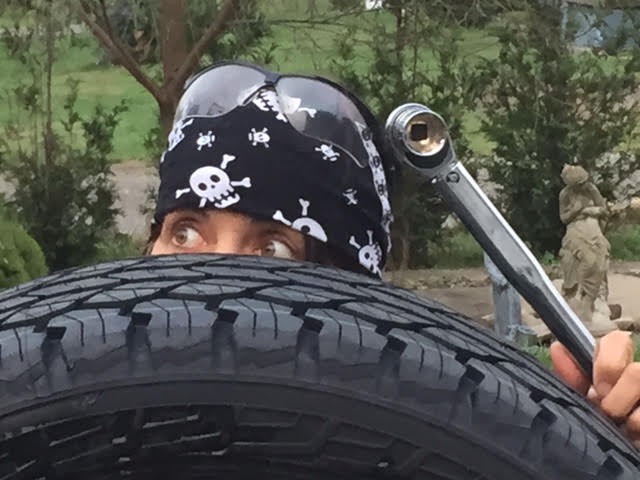
4. A tire iron/lug wrench or cross bar that fits YOUR van’s lug nuts.
Why: This is the tool needed to remove the lug nuts from your wheels. The lugs are what keep your wheel on your vehicle. Lugs come in various sizes, so you NEED to make sure that you have a wrench/bar that is a proper fit for your lugs or you will NOT be removing them… and then you will cry, and that is not very “metal”, is it?
5. Breaker bar — FOR LUG REMOVAL ONLY — Mechanics LOVE to over-torque lug nuts by zipping them on with their 800+ FT-LB Snap-On Impact guns. ALL bolts on ALL vehicles have exact torque specs for a reason, and not all techs respect this.
“Mathematically, torque is defined as the cross product of the lever-arm distance vector and the force vector, which tends to produce rotation. Loosely speaking, torque is a measure of the turning force on an object such as a bolt or a flywheel.” – Wiki
Don’t risk the inability to remove over-torqued lugs. Many of you skinnies are physically unable to “put some ass behind it” when attempting to loosen lugs, so bring a breaker bar along for help. (Oooh… and what a weapon it makes when accessible in scary, 911, non-auto related situations… WHAP!) If a tech with the strength of the son-of-Odin has over-torqed your lugs, then you may need a little help in removing those over-torqued lugs with this under-appreciated wonder. TECHNICIAN’S TIP: ONLY mutter the phrase “Hey, Thor – You can torque my lugs to spec anytime!” if you are prepared for one of two reactions: the proposal of a date, or a punch in the nose.

Here is how it goes down with the above-mentioned items:
1. Pull over to the safest, flattest, most debris-free spot on the side of the road, as far away from traffic as possible, and put your hazard lights on. Don’t drive farther than you absolutely have to — You don’t want to risk bending the rim on which the now-flat tire is mounted, and you want to avoid crushing the sidewall of the tire so that it can be plugged and reused as a spare if necessary.
2. Swear uncontrollably – But only for one minute or less. You have a gig to make!
3. Make sure your buggy is in the “Park” position and engage the e-brake.
4. Accurately asses if you are capable of performing the tire removal/replacement safely and efficiently without your car rolling, rocking or budging. If you are, then move on to step 5. If not, call AAA for help, peel some of those smooshed, old crackers from the van floor and sneak a snack while you wait for your “neon knight-in-shining-armor” to arrive for assistance.
5. Remove all necessary tools and the full-sized spare from where they live. “Block” the three good tires with bricks, wood blocks, rocks, or anything that would prevent the van from rolling as you work.
6. Loosen the lug nuts in the COUNTER-CLOCKWISE direction — “Lefty-Loosey” — with the cross bar/lug wrench while the van is still on the ground and bearing weight. Just loosen them, do not completely remove them. If the lugs are on too tight, grab the breaker bar and carefully coax them along.
7. Place the jack under the lift point that is closest to the flat tire and make sure that the jack is stable and square to the ground. Make sure you have located the proper spot on which to lift. BEST TO KNOW THIS BEFORE YOU LEAVE TOWN because this is generally where people get the impending feeling of “DUH.” If you are unsure about where to lift and if it is not marked on the van, check your manual or even call a dealership of your make for guidance. If those are not options, remember that where you set the jack to catch is where it will absorb the weight of the vehicle — anything plastic or rubber is OUT, as is anything that could potentially move – and consult Dr. Google for the lift points on your year, make and model.
8. Make sure that all limbs and all bandmates are clear from underneath the vehicle. That tire is loose, and if the cars shifts and rocks off of the jack… do I really need to explain? Rick Allen miraculously overcame the odds, but you may not be as fortunate.
9. Start cranking the jack. Lift steadily until the tire is off of the pavement. Only lift the vehicle high enough to clear the road for easy tire removal and installation, because the higher you lift, the less stable the jack will become.
10. Completely remove the loosened lug nuts by turning them COUNTER-CLOCKWISE – “Lefty-Loosey” – and place them in a safe spot for easy access, where there is no chance of recreating a “Christmas Story” scenario. (However, I DO encourage you to cuss all you want. No one is getting the Lifeboy over it, and flat tires really stink.)
11. Remove the son-of-a-bitch tire carefully.
12. Hold the wheel with the flat up in the air, throw your head back and scream “Noooooooooo!” No, wait… don’t do that. Keep your focus. Stay the course with no screwing around. Screw around later. Put the tire down on the ground away from the vehicle.
13. Install the full-sized spare carefully — no pushing, no shoving, no movements that could knock the car off of the jack. If you knock the car off of the jack without the wheel installed securely… ooof… the crashing, crunching sounds of “metal on metal” are far less cool in this scenario than in the Anvil tune.
14. Snatch the tire iron/lug wrench and replace all of the lug nuts by turning them CLOCKWISE — “Righty-Tighty” — and tighten them down LOOSELY in a star pattern by hand. In other words: MAKE A PENTAGRAM!
15. Carefully lower the vehicle until the tire is just touching the ground, slightly bearing weight, so that the tire is “kissing” the ground. (Aw…)
16. Finish fully tightening all of the lugs in a star pattern… er, PENATAGRAM. Remember: “tight is tight.” Tighten until snug and give about a quarter of a turn. Do NOT over tighten, do NOT under tighten. (Got extra room in that buggy for a torque wrench? By all means, take it with you — call a dealership of your make, call a garage, or consult Dr.Google for the lug nut torque spec on your vehicle and do it the right way with a torque wrench. Best idea: Look this up before you leave and have it on hand.)
17. Lower the vehicle completely to the ground.
18. Pack up your tools, your jack and the flat tire/wheel “you rode in on.”
Off you go!
When possible, stop at the closest garage to have the bad tire repaired or replaced and to have a tech dude or dudette double-check your work!
If this happens again — oh, and you’d better believe it just might — lather, rinse, repeat.
Notable notes on this subject:
Don’t be lazy, guys and gals. Perform a dummy check on the above mentioned items and where they are all located before you set sail. You’ve quadruple-checked that you’ve brought your iPod, iPad, iPhone, iCondoms and iCliffbars — Now, make sure you have the stuff that really matters!
Practice this service/procedure with a gearhead at your side before you ease on down the road, MJ. Knowing exactly where everything is stored and how everything works is THE way to go. It reduces risks. Try to blame the car, but we all know that it’s never the car’s fault, but rather that of the engineer, the assembly line, the mechanic or you.
Yes, YOU. Yooooooouuuuuu….
Thumbs up if your vehicle comes with its own jack, but after you’ve ensured its ability and reliability, consider upgrading to a bigger jack if that’s an option. The stock jacks will do the job, but a jack with a wider stand and bigger lift surface area can prove safer and far more effective than the stock one that is designed to “do the job,” especially if you are forced to work on a sloped, uneven or debris-covered (“crappy”) surface.
Know the locations of your buggy’s lift points! Some are even marked FOR you. (“Lift HERE, Dummy!”)
Other tire paraphernalia that you can bring along:
Tire gauge – Check the PSI of your tires regularly to make sure that it is accurately set. (Check the tire sticker on the doorjamb of your vehicle for the correct PSI. If it is missing or unreadable, call a dealer or consult Dr. Google by searching “tire PSI,” plus the year, make and model of your vehicle.)
Fix-a-Flat: Oooof… this stuff can be a blessing and a curse. Using it is a last-resort move in my book, but if you need it, you need it, so drag it along. If your buggy comes equipped with TPMS sensors for tire pressure monitoring — most common in vehicles from the year 2006 and up — purchase Fix-a-Flat that is safe for vehicles that have sensors.
A tire plugging kit: Like fix-a-flat, the presence of a full-sized spare should eliminate the need for using this on site, but it may come in handy for repairing the tire that you just destroyed. (That now-plugged ex-flat tire can then become your new spare!) REMEMBER: Only one plug per tire, and only on the flat surface of the tire that touches the pavement. Never plug a tire in the sidewall, and avoid plugging past the outmost and innermost treads.
Got a 1/2″ electric impact gun, a battery charger and an impact socket of your lug size? Well then… tuck them under the seat, out of sight and make yourself even more efficient under these circumstances and be your own pit crew!
Got space for an inflator? Sure would be nice to have one. Here’s what Eric the Car Guy suggests on the topic.
ALSO — YouTube CAN be your be your best bud. It has a lot of PRACTICAL purposes, going far beyond your general “People falling off the stage” clips… though some of those are great! Pick a tech who features how-to clips on vehicle maintenance and reference them if needed. I dig “Eric the Car Guy,” but find someone who speaks to you and bookmark his/her clips away.
Okay… you got all of this, amigos?
If I’ve made no sense to you — if your only purpose of reading this was to enjoy my witty banter and stellar word craftsmanship (<COUGH>) — then at least remember these two suggestions:
UNO: GOING OVER A ROAD-SIDE TIRE CHANGING SCENARIO WITH A TECH BUDDY BEFORE YOU LEAVE YOUR DRIVEWAY IS THE BEST WAY TO ENSURE SAFETY AND SUCCESS. This crapola is no joke, and being prepared ahead of time is aces.
“Be prepared.” – The Boy Scouts
“Be prepared for WHAT? Be more specific, or you’ll never know for WHAT you are preparing!” – The Girl Scouts
DOS: AAA is your friend. Normally, it is your friend who says he’s going to pick you up two hours early so that you will NOT miss the first and best band at the show, but instead, shows up at your door 15 minutes before showtime, ensuring that an uncomfortable and stressful “ass-hauling” session is about to ensue. But the point is this: they WILL show up eventually.
Tires, ladies and gentlemen. TIRES.
You may applaud now.
Okay, Earthlings — Pack it up, pack it in, say your goodbyes to your new comrades, strap yourselves in and prepare to forge on to the next intergalactic automotive adventure…
….Don’t forget your towel…
…Please stand by….